Changing a strut in your vehicle may seem like a daunting task, but with the right tools and instructions, you can do it yourself. In this guide, we will walk you through the step-by-step process of replacing a strut:
Tools Needed
- Impact wrench
- Ratchets and sockets (metric and/or standard)
- Spring compressor

Credit: www.wikihow.com
Step 1: Prepare the Vehicle
Start by safely lifting the vehicle and removing the wheels. Make sure you have the necessary tools and equipment to support the weight of the vehicle while working on the struts.
Step 2: Loosen Strut Mount Nuts
Using a ratcheting wrench or socket/ratchet, loosen the strut mount nuts located on the strut tower. Loosen all nuts before removing any of them completely.
Step 3: Remove Sway Bar End Link Bolt
Locate and remove the sway bar end link bolt connected to the strut. This will allow the strut to be separated from the suspension system.
Step 4: Loosen Strut Tower Bolts
Now, carefully loosen the strut tower bolts that secure the strut to the vehicle’s body. These bolts may be located at the top or bottom of the strut assembly.
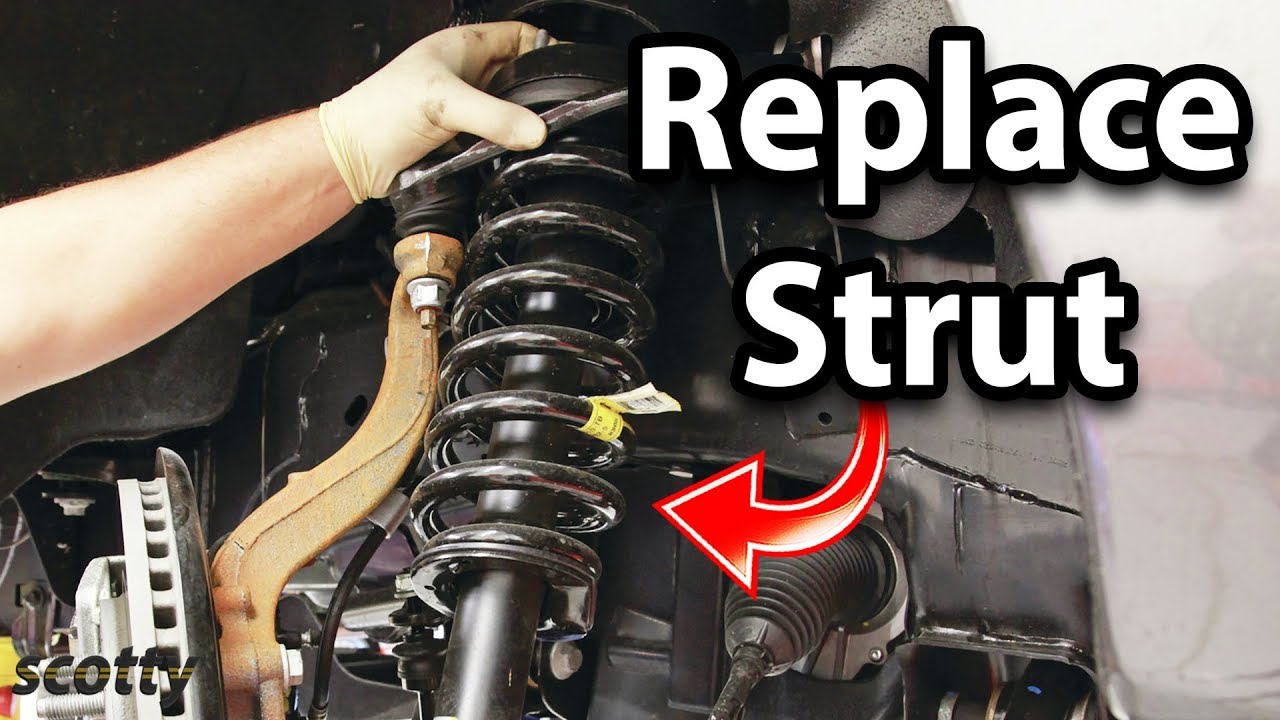
Step 5: Remove the Old Strut
Once all the necessary bolts are loosened, gently pull out the old strut from the vehicle. Be cautious not to damage any surrounding components.
Step 6: Install the New Strut
Take the new strut and align it with the mounting points. Insert the strut into place and secure it by tightening the strut tower bolts.
Step 7: Reinstall the Sway Bar End Link Bolt
Reattach the sway bar end link bolt to connect the strut back to the suspension system. Make sure it is properly tightened.
Step 8: Lower the Suspension
Once everything is securely in place, carefully lower the vehicle’s suspension and remove any support equipment used during the process.
Step 9: Perform an Alignment
It is highly recommended to have an alignment done after replacing struts. This ensures that the vehicle’s alignment is within factory specifications, preventing issues like premature tire wear.
And that’s it! You have successfully changed a strut in your vehicle. Remember to always consult your vehicle’s manual and seek professional help if you are unsure or uncomfortable with performing this task.
Frequently Asked Questions For How To Change A Strut
Can You Replace A Strut Yourself?
Yes, you can replace a strut yourself. The task may be moderately difficult depending on your mechanical experience and tool access. It involves lifting the vehicle, removing wheels, and working in tight spaces. Ensure you have the right tools and follow instructions carefully.
Do I Need A Spring Compressor To Change Struts?
Yes, you need a spring compressor to change struts. It is important to use it safely. You can rent one from your local auto parts store.
What Tools Do You Need To Remove A Strut?
To remove a strut, you will need an impact wrench, ratchets and sockets (metric or standard), and potentially a spring compressor for safe disassembly.
Should You Do An Alignment After Replacing Struts?
Yes, you should do an alignment after replacing struts.
Q: Can I Change A Strut Myself?
A: Replacing shocks and struts can be a moderately difficult task, depending on your mechanical experience and access to tools.
Q: Do I Need A Spring Compressor To Change Struts?
A: In some cases, a spring compressor is necessary to safely disassemble the strut. You can rent one from your local auto parts store.
Conclusion
Replacing a strut in your vehicle may require some mechanical experience and the right tools, but with the proper guidance, it can be done. By following the step-by-step instructions provided in this guide, you can save money on labor costs and gain the satisfaction of completing the task yourself.